Showing posts with label dessert. Show all posts

2025-08-06

Bay Leaf Ice Cream

I love the smell of fresh Bay, especially when slightly toasted -- it's exotic, herbaceous, slightly fruity -- and I thought it might be appropriate for an unusual ice cream. Fortunately, Irene has a Bay plant the thrives here on our Barcelona terrace, so she gave me a good sized branch. I wanted coax the flavors from the fresh leaves, as well as the aromatics from slightly toasted ones, so I did half-and-half. I doubt this would work with store-bought dry Bay leaves but tell me if you try it.

The procedure was pretty much a basic vanilla ice cream (or our Saffron one), but with the milk/cream first infused with Bay. The taste is appealing, and slightly exotic without being "weird"; it seems like something I'd find in a fancy restaurant. 

The faintest green cast and an inviting aroma

 20 g      Bay Leaves, fresh
300 ml     Milk, whole
400 ml     Cream
170 g      Sugar
    pinch  Salt
  3 whole  Eggs, whipped

Large branch of Irene's Bay plant

Pull the leaves from the Bay branch.
Gently toast 10 g of them in a dry skillet until the slightly brown and begin releasing their aroma.
In a pot, add the Milk and Cream, the raw and toasted Bay leaves.


Cover and let steep on low heat for an hour to infuse.
Strain and capture the Milk/Cream, then add back to the clean pot.
Add the Sugar and Salt to the still-hot mixture, and stir to dissolve.
Whip the eggs.
Ensure the mixture isn't too hot, probably 50c or less, and whisk in the Eggs.
Heat over medium heat, whisking constantly, until it hits 78-80c and the mixture starts to thicken a bit; once it starts, it thickens quickly, so be careful when it's above 70c.
Strain into a large pourable bowl or similar; I use a 1L measuring cup and get about 900 ml.
Cover with plastic film, pressing onto the surface to prevent a skin.
Let cool, then chill overnight in the fridge.
Process with an ice cream churn 20-30 minutes, then scoop into containers, cover directly with film, and freeze overnight.

It helps to let it thaw a little so it's scoopable, maybe 20-30 minutes in the fridge.
Serve.

2025-06-23

Lemon mint sorbet

We like the Grapefruit Rosemary sorbet I make, and I've got a little lemon tree and mint growing on the terrace, so let's try something with those. 

Lemon sorbet with Nona's Liqueur #3

The proportions below come from Harold McGee's table in "The Curious Cook", chapter "Fruit Ices Cold and Calculated":

Flavor        Fruit  Sugar   Lemon  Water
-----------   -----  ------  -----  -------
lemon, hard   1/2 C   8 Tbs  0 Tbs  1 1/4 C
lemon, soft   1/2 C  14 Tbs  0      1     C

Let's go with the "soft", and convert to metric:

118 ml Lemon juice
177 g  Sugar
237 ml Water

I've got 2 lemons left on my tree. Serious Eats uses 4 lemons to give 3/4 C juice (180ml) for the Lemon Tart I make, so I expect to have about  90 ml juice, so I'm scaling the above by 76%. 

        Zest of 2 lemons
135 g   Sugar (I used 121 g Palm sugar
180 ml  Water
 19 g   Mint leaves, roughly chopped to expose oils
pinch   Salt
 90 ml  Lemon Juice (2 tree lemons and 1 store-bought lemon)

Zest the 2 Lemons, chop the Mint Leaves, and add to a pot with Sugar, Water, and Salt.
Bring to simmer to dissolve the Sugar.
Cover and let it infuse 15 minutes and cool.

Juice the Lemons by rolling them firmly on the counter to loosen the juice;
use a reamer or lemon squeezer to get as much juice as possible.
Strain the Sugar solution into the Lemon Juice.
Chill overnight.
Churn in an ice cream maker.
Cover and chill overnight.

This tastes excellent -- the mint really comes through, without being grassy. 
The texture is good, smooth and not too hard. 
But it melts very quickly -- consider backing out the Sugar a bit, or adding something that will prevent the syneresis.


2025-03-11

Helado de Ajo Negro (Black Garlic Ice Cream)

Years back, Black Garlic seemed to be a secret amongst geeky pro chefs, and making it involved multi-day low temperature cooks. Now we're finding it in regular grocery stores for reasonable prices. It has a surprising and appealing sweet flavor, without the bite you might expect. I thought it might make an intriguing ice cream, and it turns out, lots of others are doing this too -- some with additions of vanilla, chocolate, honey, even 36 variations. I want my first version to be pure and direct, to showcase the ingredient; perhaps later, I'll add complementary flavors. 

Sidebar. The first Black Garlic we got here in Barcelona (from Mercadona) was in a plastic tub which contained peeled cloves with a great fruity flavor: a bit tart and a bit sweet, kinda like a like a date or tamarind, maybe a hint of balsamic vinegar. The 60 g jar we got from Consum was a surprise when I opened it for this project: it had a distinct note of garlic and not as much of the sweetness we had earlier, it might go well with chocolate, but it's too garicky for a solo tour. We went on a quest to find more sweet/tart ones and found it only in whole head form: at Ametller and Bon Preu (from the same producer and same 5€ price),  and 8€ at Fruiteries Borau (a different producer). All three contained 2 whole heads, and peeling them was not terribly easy: they were soft and sticky enough that they didn't pop out of the peels easily (I even tried freezing the heads first).  The whole heads had less overt garlicky smell and taste than the Consum jar, and I had a slight preference for the fruit of Ametller/Bon Preu brands. You might want to buy a couple different brands to find the most appealing flavor before you embark on this recipe, and get the peeled if you can; you can use less-fruity ones in savory dishes.

Most recipes I've seen mash the Garlic into a paste; this no-churn recipe just steeps then discards the cloves. Some use 1-2 Tablespoons of paste for 2.5-3 Cup of Milk and Cream; here, I'll use more for a pronounced flavor. I'll use the proportions of dairy and sugar that I use for my Saffron Ice Cream.

 70 g      Black Garlic cloves, peeled (from two peeled heads)
  3 whole  Eggs, whipped
300 ml     Milk
400 ml     Cream (35% fat UHT is what I used)
170 g      Sugar
  1 pinch  Salt

To give it some texture, mash two-thirds of the Black Garlic cloves to a paste;
slice the other half and reserve for adding at churn time.
Whisk the Black Garlic, Eggs, Milk, and Cream together in a large saucepan;
whisk in the Sugar and Salt.
Heat over medium, whisking frequently to prevent the milk from scalding, and watch the temperature.
Bring the temperature up to 78-80C / 175-180F, stirring constantly until thickened and a custard is formed, maybe 10 minutes; close to the final temperature, it will start to thicken quickly so be careful; the mixture should coat the back of a spoon. 
Transfer to a 1 Liter measuring cup with a spout and let cool.
Cover with plastic wrap, pressing the film onto the surface of the custard base to prevent a skin forming.
Chill overnight. 
If you have a frozen-canister ice cream churn (like this Duronic frozen-canister style I bought recently), freeze the canister overnight as well.

The next day, pour the base into a chilled churn; while churning, add the reserved sliced Black Garlic.
Churn for the recommended time, usually 20-30 minutes.
Distribute into freezer containers, cover the top of the ice cream directly with plastic film, cover with lids, and freeze overnight.

Before serving, check out the texture: you might want to let it thaw 15-30 minutes in the fridge to provide a scoop-able texture.

Small scoops served in pastry shells


Funny that this popped up in my Duolingo Spanish lesson -- maybe she should have used Black Garlic instead of fierce normal garlic.


2025-02-03

Waffle "Cake": Eastern European crunch and sugary sweetness

A new shop opened near us, Senzi Aliment, a delightful combination of Eastern European (CIS: Commonwealth of Independent States), Italian, and Spanish ingredients. I spotted stacks of waffle-like crackers -- the texture you'd find inside KitKats, which I find irresistible -- and knew I had to figure out how to use them. They're the size of dinner plates, so looked like you might turn them into some cake-like dessert. I asked the proprietor and he grabbed me a can of Dulce de Leche, and pantomimed how you'd spread it on each waffle cracker, then layer them. 

I made a simple version with a quarter of the waffles I got and it was OK but not stunning. The waffles had lost their crunch, which was not surprising -- they sublimated into the sugary mass -- but I'd have preferred if they could have somehow retained a crunch. But it was fun and trivial to make, and introduced me to something I'd never heard of. 

Alternating cocoa and plain waffles, dulce de leche and sweetened condensed milk

Some web searching on the name on my receipt, "vafli tarta", resulted in a mix of recipes in English (8 waffles with butter and cognac and Peters Food Adventures with 5-10 waffles with several additions, good pictures), Bulgarian (adding walnuts, chocolate, cream)Ukrainian (5 waffles, variations with butter, or sour cream, or custard), Latvian (adding chocolate and mascarpone), Latvian (9 waffles, coffee powder, nut garnish), and others.

The approach is the same: spread the waffle crackers with Dulce de Leche and/or Sweetened Condensed Milk (with optional flavors), and layer them, then chill for a few hours in the fridge. Some make Dulce de Leche by boiling Sweetened Condensed Milk for three hours, but we can buy it here.

I expect the butter, cream, and booze make the Dulce de Leche easier to spread. Chocolate seems a natural addition, and the acidity of fruit would add a welcome balance. If the top or sides are spread, chopped nuts would make for an elegant presentation. 

My 90 g package of "Vafelu Plaksnes Tortem Ar Kakao Garsu" from Ukraine contains 9 waffles: 4 cocoa colored and 5 cream color, about 20 cm in diameter.

Even with additions, it sounds absurdly sweet, and the two of us couldn't finish the 9 waffles and 9 layers of sugary spread. At least not the full cake sized waffles! Peters Food Adventures says it can be cut then frozen for storage, but still, it's a lot. I think the height is attractive, so I'll cutting them into quarters so I can try variations. I had a can each of each spread, and for my 1/4 version, didn't use even a quarter of either can; I don't know how much I actually used, so can't give measures below.

My quartered preparation here made 4 generous slices; a full stack would provide 16.

1 90 g package Vafli Tarta waffle crackers (stack of 9)
1      can     Sweetened Condensed Milk
1      can     Dulce de Leche
               Toasted nuts (optional)

While still wrapped -- holding everything snugly --  use a bread knife to cut the stack of waffle crackers into 4 wedges; save three of the stacks for later flavor combinations.


Spread the Sweetened Condensed Milk on the 5 cream colored wafers.
Spread the Dulce de Leche on the 4 cocoa colored wafers.
Stack, alternating colors.


I ended up painting the top wafer by mistake, so I'll top it with chopped nuts for services.
Cover with cling film, add a weight, and let chill in the fridge for a few hours or overnight.


Top with toasted ground Almonds or other nuts you have on hand.
Slice with a bread knife, and serve -- ideally with big mugs of strong coffee.


The toasted almonds helped provide some of that crunch; I could mix some through the layers next time.
I'll probably add some tart jam (raspberry, cranberry, marmalade) in with the Dulce de Leche, or replace one of the spread layers. None of the cocoa flavor came through from the waffle; if you're looking for that, add some grated intense chocolate.

I've made further variations on this with subsequent 1/4 waffle sets.

The first used a couple layers of home made cranberry/ginger relish, which was a good bright accent, but made the waffles softer than I wanted. 

For the second, I finely grated 90% cocoa chocolate onto the inner Condensed Milk layers: the taste was good but the dryness of the chocolate dust caused the waffles to want to delaminate -- mix it through a bit next time.

For my final 1/4 package of waffles, I'm thinking of peanut butter and the remaining chocolate, or tart tamarind concentrate, or bitter marmalade.

2024-07-04

Almendrados: Spanish almond cookies, 3 variations

I saw a recipe that needed roasted skin-on almonds, got them, then forgot what I wanted them for: definitely something Spanish, probably dessert-like. So I hit upon Almendrados, almond cookies. I found some variations and decided to make three. Below, the first two are similar techniques and I used the skin-on whole almonds (ground up), while the final one was more fussy and I used store-bought finely ground almonds; you can see the difference in the color. It's not quite a fair comparison, and I probably wouldn't buy the whole skin-on nuts again: they give the cookies an unappealing "health food" look. 

Variations: #1 bottom, #2 top right, #3 top left

TL;DR: the first recipe below is the easiest and was quite good; the second was quite dry and requires a glass of sherry; the last is visually the most appealing (pale finely ground almonds) and was like a shortbread, similar to Spanish polvorónes we see in wintertime.

#1: Spain On A Fork: 3 ingredients -- an easy treat

Some of the other recipes I've made from his site turned out well, and his videos are quite helpful. 
These had a good chew and definite sweetness that made them a treat.


260 g Almonds, ground fine
120 g Powdered Sugar
  1   Egg, separated

Grind the Almonds as fine as you can in a food processor or blender, but watch out it doesn't go so far as to turn into nut butter. Mine are not as fine as I'd liked, and I wouldn't use the skin-on nuts again.
Add to a large bowl, and add the Powdered Sugar.
Separate the Egg into White and Yolk.
Whisk the Egg White about 15 seconds to fluff and add to the Almonds and Sugar.
Mix together and when it starts combining, use your hands to squeeze it together; if it's too sticky, add a bit of ground Almonds or Flour; if too tight, add a little water.
He shapes them into "chicken nugget design" but I kinda rolled the mass between cling film to a bit under a centimeter then cut into rectangles with a knife -- it was easier.
Set on a parchment-lined baking sheet, and press grooves into the tops of each.
Whip the reserved Egg Yolk and paint each one.
Bake convection at 190C for about 10 minutes.
Remove from oven, then dust with a bit more Powdered Sugar, and let cool.

These didn't look too impressive but they were a treat to eat: sweet, a bit of a chew, and much more fun than the ease of this recipe would suggest.
I expect using finely ground, pale, store-bought ground almonds would make this more appealing.

#2: Spruce Eats: similar technique, more fussy -- dry, no joy

Spruce Eats recipes seem well-researched and others I've made have turned out well.
This one, however, made me think of "health food": dry, almost no sweetness -- it didn't bring joy.
I halved their recipe here to accommodate the amount of ingredients I had.
Perhaps it would have been better with store bought almond powder but the extra work compared to the first recipe doesn't seem justified.

Not appealing, in looks or taste; this shouldn't be "health food"

1/2   Lemon, zest
  1   Egg
227 g Almonds, ground
125 g Sugar, granulated

Zest 1/2 Lemon.
Separate Egg into White and Yolk; use an electric whisk to whip the Whites in a glass until stiff peaks formed. 
Mix the Yolks then gently combine with the whipped Whites, don't worry about getting it uniform.
Add the Sugar, Lemon Zest, Ground Almonds, and combined Egg to a bowl.
Mix with a spatula then your hands until it's well combined. 
I used a disher (miniature ice cream scoop) to load the dough, compress, then emplace onto a parchment-lined cookie sheet.
Bake at 190C convection about 15 minutes until golden; this was hard to tell with our skin-on almond color, but no problem.
Remove and cool.

These were too dry, with almost no sweetness; any hints of lemon were lost. They cried out for Sherry.
I'm surprised how "sad" these seemed compared to the previous recipe since the ingredients are basically the same; I would have figured the inclusion of yolks would have made these richer but, the the whipped whites would have made them puffy, but it wasn't the case.
I probably wouldn't bother with these again.


#3: Visit Southern Spain: totally different technique -- impressive looking, shortbread-y

This was a totally different technique and yielded cookies that looked ... like cookies. It involved chilling, rolling, and cutting the dough but wasn't really that difficult. 
They had a shortbread crumbly texture, almost like the "polvorónes" that appear everywhere here in Barcelona around Christmastime.

Appealing and rather good "short" cookies
200 g Flour
4.5 g Baking Powder (1 tsp)
125 g Sugar, white, granulated
125 g Butter, room temperature
  2   Eggs (one reserved for garnish)
   Sliced Almonds, for garnish

Sift Flour into a large bowl.
Happily, the bag of store-bought ground Almonds was 125 g so I didn't have to do anything.
Add Almonds and Baking Powder.
Make a well in the center and add Sugar, Butter, 1 Egg.
Combine as well as you can with a spatula, then use your hands to bring it all together.
Form into a ball and wrap in a large piece of cling film; refrigerate for 30 minutes.
Remove and spread out film, top with another layer of film, and roll out to about 3/4 cm thickness.
Chill in fridge again for about 10 minutes.
Use a glass to cut circular cookies; I dipped mine into ground almonds to keep it from sticking, but the amount of butter in these would probably prevent any stickage.
Place on parchment-lined cookie sheet, whip up the reserved Egg, and paint with the egg wash; garnish with Sliced Almonds.
Bake about 12 minutes at 190C convection until browned.
Shape and roll the remaining dough, cut, and place on another parchment-lined sheet, wash, and garnish; bake.
Remove and let cool.

These are fairly impressive looking, like something you'd get at a bakery.
They're rather good, maybe a bit crumbly -- "short" -- for my taste, but worth the trouble of chilling, rolling, cutting.


2024-05-20

Chocolate Coulant: time and temperature are a challenge

I've had this recently at three fancy restaurants (has it come back into fashion?) and decided to try and make it myself. It's an intensely chocolate dessert cake with a molten interior. My favorite was served unmolded on a plate, the other two were in the ramekins they were baked in. The challenge is getting the batter set just enough but not to much -- see my disastrous result below, and improvement after that.

Second Try: slightly over-baked, no liquid center

I've halved the recipe from My Parisian Kitchen and am trying it first with the mediocre store brand chocolate (40% cocoa) I have on hand; she didn't specify the type of flour, so I used cake flour with 10% protein. If I can get the texture right -- delicate cake barely containing the liquid center -- I'll try again with good quality chocolate.

Serves 2 richly.

  2    Eggs
 70 g  Sugar
 67 g  Dark Chocolate (55-70% cocoa)
 60 g  Butter, unsalted, cut into chunks
 22 g  Cake/Pastry Flour (Farina per a rebosteria)
pinch  Salt
       Butter, soft
       Cocoa, for dusting, optional

Just five basic ingredients

Melt the Chocolate with the Butter in a microwave (about one minute) or double boiler; let cool a bit to avoid cooking the Eggs.
Whisk the Sugar and Eggs together until smooth.
Slowly whisk the Chocolate mixture into the Egg mixture, whisking continuously.
Sift the Flour into the mixture and add a tiny pinch of Salt; gently whisk to combine.

Butter the insides of two 200-250 ml ramekins; optionally dust with Cocoa to coat bottom and sides.
Fill the ramekins with the batter.
My batter was about 325 ml and my ramekins are only 175 ml so the batter came up higher than I would have liked; fortunately it didn't overflow!


Chill in the fridge for at least an hour. You want them to be cold when they hit the oven so the outside bakes to become cake-y while the inside remains unset.

Preheat the oven to 200C.
Remove the ramekins from the fridge and bake about 10 minutes until the outside sets and the liquid sheen on the top disappears.
Serve immediately in their ramekins with a spoon.

(You might be able to invert these and gently release the cakes from the ramekins, but I've read that this is almost impossible. It might be facilitated by lining the ramekins with parchment, but bakers better than me use bottom-less baking circles lined with buttered parchment set atop parchment-lined baking sheets.)

Now the results... I cooked these directly from the fridge on the chilled baking sheet for 11 minutes. Then I inverted the less-risen one on the left to release it -- disaster!


An examination of the ramekin showed that there was only a hint of cake forming around the outside, and nothing on the bottom to encase the liquid center: it needed a lot more time in the oven. I put the taller one back in for another few minutes and you can see it rose a little more.

Improved rise but still not set below

But this one too lacked any cake structure at the bottom and barely any around the sides -- just a little around the top edges. I need to adjust the time and heat to cook the cake on the bottom and sides.

Happily, it looks like my 175 ml ramekins will barely hold the batter and the soufflé-like top is quite appealing. Silicon baking molds might allow the heat to penetrate better and possibly release cleanly, but the shock of inverting the mold onto a plate still risks breaking the cake shell.

Next time... Don't use a chilled or even room temperature pan below the ramekins: it prevents heat from circulating around the bottom.  Increase the cooking time, to at least 15 minutes.  Perhaps remove the ramekins from the fridge while the oven is preheating to allow the ceramic to warm up a bit and give the lower part a chance to heat through; experiment by taking one ramekin out early, and/or by baking one 5 minutes longer than the other. Perhaps try spooning cooled batter into room temperature ramekins, or baking room temperature batter. Lots of things to try. 

Second Try: 20 minutes -- cake-y all the way through

More importantly, I did not place anything below the ramekins (to let air circulate), and baked for 20 minutes at 200C.  It was cake-like all the way through -- including the bottom -- with just a hint of not-quite-liquid chocolate in the center.  At 15 minutes I saw liquid chocolate flowing out of the top like lava (onto the oven floor, oops), so I left it in another 5 minutes -- maybe I should have taken it out at 15.

Interestingly, they were set enough that they (barely) released, because they were almost as firm as a muffin or cupcake.

Next time, try 18 minutes, or maybe one at 15 and the other at 18 minutes.


2024-04-12

Japanese Cheesecake

I love cheesecake and have been hearing about this trendy light Japanese crustless version, so I tried to make it. On my third attempt, I think I've come up with something that works well: it's fluffy, almost soufflé-like. Everything here is taken from the exquisitely-detailed recipe/technique from Nami at Just One Cookbook, so look there for better photos and descriptions, including a link to a helpful video. Hers looks a lot more professional than mine, but I'm happy with the flavor and texture I've gotten with my too-short pan.

Cheesecake has a muffin top due to my short cake pan

For my first try, I used her parchment lining technique but with a springform pan and was annoyed by the fidgety parchment lining; worse, the water bath seeped through my tin foil lining making the bottom a bit soggy. For my second try, I realized I didn't need to line the springform pan -- it would release fine -- and I put the water bath below the cake pan (for humidity) instead of bathing the pan: it came out dense on the bottom, indicating the cake needed the heat moderated by the bath.  On my third try, I used a solid pan -- as Nami does -- directly in a water bath, and just dealt with the parchment lining; my pan is slope-sided where hers is straight, which makes lining a little more difficult, but it doesn't have to be exact; it worked well enough that I don't think I need to buy another pan with straight sides -- I can live with the muffin-top profile.

Her recipe is long, but very detailed, which I appreciate. First, note that if your pan is smaller than hers/mine, she provides ingredients scaled to a single egg, then she provides the full 6-egg recipe, so you can scale for your pan. 

As an overview, you "melt" the cream cheese and other batter ingredients then whisk in the egg yolks and flour to make a batter. Then you whip the egg whites into a stiff meringue, then gently fold them together.  I follow her advice about dropping the oven temperature twice.

The 6 eggs barely fit my slope-sided pan which is 20 cm at bottom and 23 cm at the top; the parchment lining must be higher than my pan's 4 cm to accommodate the rise, but the parchment lining flexed and created the muffin-top shape. If you have a different sized pan, scale the recipe appropriately, but realize this will rise dramatically before falling while it slowly cools.

Do take her advice to measure the ingredients beforehand: there's plenty of prep work. I'm trying to simplify this a little by combining measuring into cooking vessels.

Prep the Cake Pan

Use a 23 cm / 9 inch solid cake pan, preferably 10 cm / 4 inch high (mine's only about 4 cm).
Butter the pan bottom and sides so the parchment will stick.
Cut parchment strips to make straps long enough to cross the bottom, up the sides, and over the edge; set them in an X-shaped pattern to make a sling to remove the finished cake.
Cut another strip 10 cm high and line the side of the pan.
Cut a disk for the bottom and press into place.
Set aside.

Sling straps, sides and bottom lined

Batter

  6    Eggs, large
300 g  Cream Cheese
 60 g  Unsalted Butter
200 ml Heavy Whipping Cream (about 35% fat)
       Zest from 1/2 Lemon
 30 ml Lemon Juice (from about 1/2 lemon)
 80 g  Cake Flour

Separate the Eggs and chill the Whites for the Meringue below.
Make a double boiler from a pot of water topped by a medium-sized bowl.
Weigh the Cream Cheese, Butter, Cream, Sugar directly in the bowl.
Add to the double boiler and warm to melt the ingredients, combining with spatula or whisk.
When blended, remove from heat.
Sift in the Cake Flour through a strainer, and whisk to blend.
Strain through the strainer into a large bowl.
Whisk in the Lemon Zest and Juice.
Whisk in the Egg Yolks, one by one, with a hand whisk.

Prepare Oven and Water Bath

Put a roasting pan in the oven and preheat to 165C with convection (15C higher without).
Bring 1 Liter of water to boil.

Meringue

  6   Egg Whites from above, cold
100 g Sugar
1.5 g Cream of Tartar (optional to stabilize)

Clean the medium bowl thoroughly for the Meringue: don't leave any fat, soap, or water on it which would interfere with the development of the foam.
Whip the Egg Whites with an electric whisk (stick blender attachment) on medium until opaque, foamy, and just a little bubbly, about 2-4 minutes.


Whisk in the Sugar and Cream of Tartar, a bit at a time, then increase whisk speed to high; whip until quite dense and it forms stiff peaks.


Gently fold in a third of the Batter with a hand whisk, then repeat with another third, then finally mix it back into the Batter and gently combine with the whisk.
Pour into the lined cake pan.


Pour boiling water carefully into the hot roasting pan, then place the cake pan in water bath; ideally the water will come half way up the cake pan.
Drop the temperature to 145C convection, bake 70-75 minutes.


Reduce temperature to 135C convection and bake another 10 minutes.
Check for doneness: a skewer should come out clean.
Turn off the oven and open the door a crack but let the cake cool very slowly to minimize collapse.
After 20 minutes, remove from the oven.


Use the straps as a sling and move the cake to a plate.
Remove the parchment around the sides. 
Let cool and serve.


2023-11-09

Panellets: Bonny Boniato

It's fall in Barcelona which means it's time for Castanyas/Castañas (roasted chestnuts) and Panellets, little confections of patata (potato) or moniato/boniato (sweet potato). There are little stalls on street corners selling roasted chestnuts and boniatos; it seems kinda strange to see cooked sweet potatoes for sale on the street, but it's a tradition. October 31 is actually celebrated as Castenyada/Casteñada in northern Spain. After I spent a fortune at the bakery last year on "two of each", Irene made a bunch with potato and they turned out quite well. This year, I wanted to use boniato because I figured the earthy sweetness of the spud would work well with the nutty coatings. 

This turned out a bit more moist than last year's with potato, which was more appropriately biscuit-y. You might want to increase the ground Almonds to compensate for the Boniato's wetter texture.


Makes 40.

For the dough:
150 g Boniato (1 medium)
250 g Almonds, finely ground
200 g Sugar
1/8   Lemon Peel, grated fine on a microplane

For the coatings:
  2   Eggs, separated
      Almonds, coarsely ground (we had sliced, so chopped them)
      Coconut, shredded, unsweetened or sweetened 
      Pine Nuts
 
Boil the Boniato until it's cooked; let cool and peel.

Boniato, cooled, cooked, and peeled

Press through a potato ricer or mash them as best you can.
Mix in the Ground Almonds, Sugar and Lemon Peel.
Let cool so the dough firms up.

Now it's time to shape and coat them. Traditionally, each different coating uses a different shape: spheres, pyramids, cylinders, etc. For simplicity, we made balls for all of them. 

Lightly butter two cookie sheets or use non-stick baking sheets.
Use a disher or spoon to scoop out little balls, then roll them in your palms to make smooth spheres. 
Separate the Eggs into bowls for white and yolk.
Put toppings -- Chopped Almonds, Shredded Coconut, Pine Nuts -- into separate low bowls.
Dip some of the balls into yolk and then Coconut, roll to cover, then place on the nonstick baking sheet.
Repeat with more balls using Egg White and Almonds.
Dip the remaining balls into a mixture of the Egg White and Yolk, then coat with Pine Nuts: this is the most fidgety part, as the Nuts are so large they don't want to stick well to the Boniato balls.
Apply a bit of the egg mixture as a wash to all the Panellets to help them brown nicely.


Bake about 10-15 minutes in 180C convection until the nuts are barely golden and attractive.
Let cool.
Serve with Moscato sweet wine. 


2023-10-19

Saffron Ice Cream: no churn

My favorite ice cream is saffron but here in Barcelona, I don't have my old churn. I'm basing this recipe on Leite's Culinaria no-churn vanilla ice cream, converting to metric, then scaling to match the common size of Cream we find here.

Saffron ice cream in cones, with sweet Moscatell dessert wine

This turned out well, though it was not as fluffy as my churned version. It was a little firm, so I'll let it soften a bit in the refrigerator before scooping. It was intensely saffron-y, probably because I can get good quality saffron here at reasonable prices. The Sweetened Condensed Milk gave it a slight caramel flavor which I'd like to reduce, but backing it out it would reduce the sugar which would make it even more firm.

0.2 g    1/8 tsp    Saffron Threads (1/2 of a 0.4 g jar)
 15 ml     1 Tbs    Brandy (or Rum)
200 ml   2/3 C      Heavy Cream, chilled
200 ml   2/3 C      Whole Milk, chilled
340 g     12 oz     Sweetened Condensed Milk
  1 pinch  1 pinch  Salt

Crush and infuse Saffron threads in Brandy for 30 minutes or longer.

Whip the Cream until small to medium peaks form, about 8 minutes.
In a separate bowl, combine Milk, Condensed Milk, Salt.
Mix in the infused Saffron Brandy.


Gently whisk in the Whipped Cream into the Milk Mixture.


Pour into a loaf pan or other container; I used a 500g plastic sorbet tub with tight-fitting lid.


Cover with plastic wrap or lid and freeze until fully set, at least 4 hours.
Serve directly from the freezer, or if it's too firm, let warm up a bit in the fridge until it's scoop-able. 

2023-05-14

Gâteau Basque #2

I made Gâteau Basque once before with an unusual technique that required piping the base and top in a spiral; it was a nuisance but I see Spanish Sabores does it the same way. This time, I want to avoid that fuss and make a more standard pastry top and bottom, like NY Times (paywall) and Serious Eats do; like Serious Eats, I'll fill with both jam and pastry cream; I've got an excess of marmalade so I'll use that instead of traditional black cherry. Here in Barcelona, I don't have my old stand mixer, so I'll make the pastry by hand, as shown in this traditional preparation video which I found on the Fête du Gâteau Basque official site, and also this video with clear quantities and technique. I'm starting from the Serious Eats recipe, including their Pastry Cream.

When I made this, I let the Pastry butter warm up, and was not able to get the sandy texture -- it congealed. But I chilled it and reworked a bit later, and it still turned out well.  My cake pan has a 20 cm (8 inch) interior with 4 cm steep sides, and 24 cm across at the top. The quantities of Pastry and fillings below worked well for this. The Almond "flour" is actually very finely ground almonds, not as fine as wheat flour. 

Pastry

250 g      Flour
 50 g      Almond "Flour"
150 g      Sugar
  4 g      Baking Powder [I had only 3.2g]
pinch      Salt
210 g      Butter, unsalted, cold, cut into 1cm cubes
  1 large  Egg (50g [mine was 59 g]), cool

In a large bowl, whisk Flour, Almond Flour, Baking Powder, Salt, and Sugar.
Mix in half the cubed Butter, and rub the butter into the flour; add the rest of the Butter, and continue rubbing in to get a sandy texture; see the video for clear technique.
Add 1 Egg, and again mix by hand, then knead into a smooth ball; it should be soft and sticky.
Divide in two portions, one slightly larger than the other for the bottom; shape into flat disks, wrap each in plastic wrap, and refrigerate 3 hours or overnight.

Pastry Cream

455 g      Whole Milk
           Orange Zest from one Orange (microplane)
115 g      Sugar
 30 g      Cornstarch
pinch      Salt
  4        Egg Yolks (70g)
 30 g      Butter, unsalted, cold, cut into 1cm cubes
2.5 ml     Vanilla Extract (1/2 tsp)

Infuse Orange Zest in Milk by combining in a pot, bring to bare simmer, then cover and steep for 30 minutes. Because this is hot, you'll need to temper the egg mixture.
Make an ice bath to chill the Pastry Cream and set aside.
In heatproof bowl, whisk the Sugar, Cornstarch, Salt; whisk in Egg Yolks until smooth, pale yellow, and fluffy -- about 1 minute.
My Infused Milk threatened to separate so I blitzed with a stick blender.
Slowly whisk the warm Infused Milk into the Egg mixture to temper it.
Return to sauce pan, cook over medium heat while whisking continuously until it begins to thicken (at 80C), about 5 minutes. 
Continue whisking, pausing every few seconds to check for bubbles; when they appear, set a timer and whisk continuously for 1 minute; this neutralizes starch-dissolving egg proteins.
Off heat, whisk in butter until melted and thoroughly combined.
Strain through fine sieve into heat proof bowl; I skipped this as I want the fine zest in my filling.
Put film directly on surface to prevent skinning, and transfer to an ice bath  to chill 30 minutes, then refrigerate until cold, about 2 hours or overnight.
Whisk in the Almond (Vanilla) Extract.

Whisking eggs into sugar

Assembly, Baking

200 g      Marmalade, room temperate to ease spreading
  1 large  Egg (50g) for wash
 15 ml     Milk for wash

Preheat oven to 180C (350F).
Grease 20 cm (8 inch) cake pan with butter and hold in refrigerator.
Whisk the Pastry Cream with an electric whisk, egg beaters, or regular whisk to fluff it up.
Remove dough disks from fridge; you'll need to let them warm up for 15-30 minutes so you can roll out the dough.
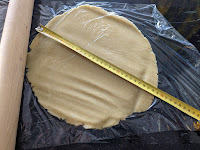
Spread film or parchment on a counter, then place the larger dough disk it, and cover with film or parchment; roll it out to 28 cm -- enough to cover bottom and sides of cake pan. 
Store covered in film/parchment in fridge while you work on the next one.
Repeat rolling out the smaller disk for the top, rolling to 24 cm between film/parchment; store in fridge.


Remove the larger disk and transfer to greased cake pan, gently pressing into corners, and running it up the sides.
Add Marmalade and smooth out.
Add Pastry Cream and spread evenly on top of the jam.


Remove smaller disk from fridge and transfer to cake pan to cover the filling.
My filling did not come up to the top of the pan, so I pressed the edges of the top to the bottom where it ran up the sides, then folded it over to the center to seal.
Whisk 1 Egg with the 15 ml Milk and brush top.
Use tines of fork to create a traditional diagonal crosshatch pattern.
Use a knife to cut a few small air vents along the crosshatch lines.


Bake 45 minutes at 180C (350F) until cake is puffed and deep golden brown
Let cool completely, about 2 hours.
Loosen edges with a knife, invert, then invert again onto serving platter.


Slice and serve.

Marmalade on bottom, left side; lots of pastry cream on top, crumbly cake-y top

Next Time...

I'll use cold butter for the pastry, as I've corrected in the instructions above.

The bottom is a little wet; can I warm up the jam and spread it on top of the pastry cream?